
Building a tiny house doesn’t have to drain your savings account. With strategic planning, smart material sourcing, and a willingness to roll up your sleeves, anyone can construct a compact, functional home for a fraction of conventional building costs. The key lies in knowing where to splurge, where to save, and which shortcuts lead to quality results versus expensive do-overs. This guide walks through the practical steps to build a tiny house cheap, from design decisions that slash expenses before you even break ground to finishing touches that keep your budget intact.
Table of Contents
ToggleKey Takeaways
- Design your tiny house with a simple rectangular footprint and basic gable or shed roof to minimize lumber waste and labor costs before construction begins.
- Source materials strategically by purchasing from local lumber yards, using OSB instead of plywood for sheathing, and shopping salvage yards for windows, doors, and fixtures to reduce material expenses by 20-50%.
- A hybrid approach—building the shell yourself while hiring licensed professionals for electrical, plumbing, and mechanical systems—balances labor costs with code compliance and safety.
- Plan your foundation, tools, and utilities upfront; common budget-busting mistakes like skipping foundation planning, underestimating tool needs, and mid-build design changes can easily double your costs.
- Building a tiny house cheap is achievable for $15,000-30,000 by combining DIY effort, simple design choices, and smart sourcing rather than attempting expensive off-grid systems initially.
- Always prioritize permits and weatherproofing even though they add upfront costs, as they prevent costly repairs, protect resale value, and ensure legal occupancy.
Plan Your Tiny House Design to Minimize Costs
The planning phase determines whether your project stays affordable or spirals into expense. Start with a rectangular footprint between 8×16 feet and 8×20 feet, dimensions that match standard trailer sizes and minimize lumber waste. Complicated rooflines, bump-outs, and custom angles look appealing in renderings but add hours of labor and material costs.
Choose a simple gable or shed roof with a pitch between 3:12 and 5:12. Steeper pitches require more roofing material and create unusable loft space. A shed roof is the most economical option, using roughly 20% less material than a gable while providing adequate headroom.
Skip the loft if mobility isn’t a concern. Ground-level sleeping areas eliminate the need for structural support beams, ladders, and railings, all of which add cost. If you do need a loft, keep it simple with basic 2×6 joists on 16-inch centers and skip decorative railings in favor of a sturdy cable or pipe system.
Standardize your window and door sizes. A 32-inch exterior door and 24×36-inch windows are readily available at big-box stores for a fraction of custom sizes. Plan your rough openings around these dimensions rather than adjusting your design around salvaged windows, that route often leads to costly framing modifications.
Use detailed CAD plans to calculate exact material needs. Guessing leads to overbuying and waste. Most tiny house plans include cut lists, but verify every measurement against your specific design. Standard lumber comes in 8-foot, 10-foot, 12-foot, and 16-foot lengths, design your framing to maximize each board and minimize scrap.
Before finalizing any design, research local zoning and building regulations that govern minimum square footage, ceiling heights, egress windows, and foundation requirements. Discovering code violations mid-build can force expensive redesigns or prevent occupancy altogether.
Source Budget-Friendly Building Materials
Material costs typically represent 50-60% of a DIY tiny house budget. Shopping smart here makes the biggest impact on your bottom line.
Buy lumber from a local sawmill or lumber yard rather than big-box stores. You’ll pay 20-30% less for dimensional lumber, and you can often negotiate discounts on bulk orders. Ask for grade #2 or better framing lumber, you don’t need premium select boards for studs and joists that will be covered anyway.
Purchase SIP panels (structural insulated panels) or standard rigid foam insulation in 4×8 sheets instead of spray foam. A single 4×8 sheet of R-15 polyiso foam costs $40-60 and provides the same insulation value as $150-200 worth of spray foam for that same area. You’ll need to cut and fit it yourself, but the labor is straightforward.
For exterior sheathing, use 7/16-inch OSB instead of plywood. It costs roughly half as much and performs identically under siding. Reserve plywood for subfloors and roof decking where moisture resistance matters more.
Skip premium siding options like cedar shakes or fiber cement in favor of T1-11 plywood siding or metal corrugated panels. T1-11 runs $25-35 per 4×8 sheet and serves as both sheathing and finished siding when properly primed and painted. Metal panels cost $1-3 per square foot and last decades with zero maintenance.
Reclaimed and Salvaged Materials
Salvage yards, Habitat for Humanity ReStores, and Craigslist offer deep discounts on windows, doors, cabinets, and fixtures. A salvaged steel entry door that retails for $300 new often sells for $50-75 used. Kitchen cabinets from home remodels go for pennies on the dollar.
Inspect salvaged materials carefully. Check windows for broken seals (visible fogging between panes), test door hardware, and verify cabinet boxes are square and free of water damage. Pass on anything that needs extensive repair, your time has value.
Reclaimed lumber works well for interior trim, shelving, and accent walls but requires extra prep. Budget time for pulling nails, planing rough surfaces, and cutting around defects. For structural framing, stick with new lumber that meets current code requirements.
For roofing, new materials make more sense than salvage. A full tiny house roof (roughly 200-300 square feet) uses only 2-3 squares of shingles ($60-90 total), and used shingles often fail within a few years. The cost savings from using proper materials upfront prevents expensive repairs later.
Choose Between DIY Construction and Hiring Help
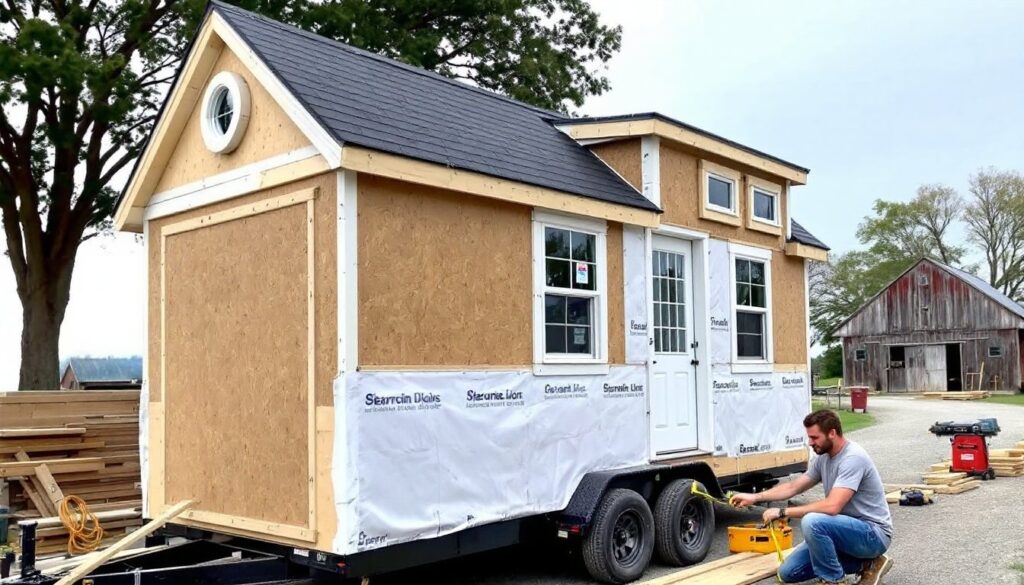
Labor represents the other 40-50% of construction costs. A skilled crew can frame and close in a tiny house shell in two weeks, but that convenience comes at $5,000-15,000 depending on your region. Building solo or with friends can cut that expense to zero, though it will take significantly longer.
Be honest about your skill level. Framing, roofing, and basic electrical work are learnable for someone comfortable with tools and willing to watch instructional videos and read code books. Plumbing, gas lines, and electrical panel installation require specific knowledge, mistakes here create safety hazards and costly repairs.
Consider a hybrid approach: build the shell yourself and hire licensed professionals for mechanical systems. Most jurisdictions require permitted electrical and plumbing work performed or inspected by licensed contractors anyway. Trying to hide unpermitted work jeopardizes insurance coverage and resale value.
For framing, two people work more efficiently than one. Wall sections become unwieldy above 8 feet, and setting roof trusses or rafters safely requires a second pair of hands. Line up a helper, whether a friend, family member, or fellow DIYer, before starting vertical work.
Rent specialized tools rather than buying them. A pneumatic framing nailer rents for $35-50 per day versus $300-500 to purchase. Same goes for scaffolding, power augers, and concrete mixers. Calculate your actual usage time and compare rental rates to purchase prices.
If hiring contractors, get three written quotes that detail materials, labor, timeline, and payment schedule. The lowest bid isn’t always the best value, check references, verify licensing, and confirm insurance coverage. A contractor who ghosts your calls after taking a deposit will blow your budget faster than paying fair rates to a reliable pro.
Save Money on Utilities and Systems
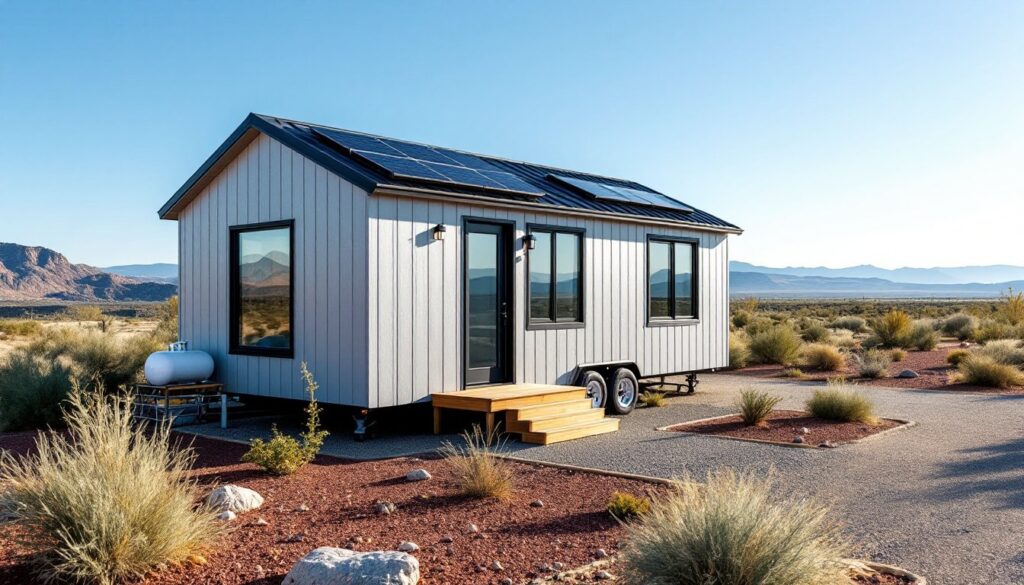
Off-grid systems sound appealing but often cost more upfront than grid connections. A solar power system adequate for year-round tiny house living (3-5 kW) runs $8,000-15,000 after equipment and installation. Grid connection fees range from $500-3,000 depending on distance to the nearest pole. Do the math based on your specific site.
If going solar, start with a small system that covers lighting and small appliances, then expand later. A 1 kW starter setup with two 300W panels, a charge controller, and a battery bank costs $2,000-3,000 and handles LED lights, phone charging, and a laptop. Add panels and batteries as budget allows.
For water, a simple RV-style system with a fresh water tank, 12V pump, and drain lines costs $300-600 in parts. Many tiny house builders use standard RV fixtures and fittings that are designed for compact spaces and easy winterization. If connecting to municipal water, hire a licensed plumber for the tie-in to avoid code violations.
Composting toilets eliminate the need for a septic system or sewer connection, saving $3,000-10,000. Models from Nature’s Head or Separett cost $900-1,200 and require minimal maintenance. If you must have a flush toilet, an RV macerator toilet costs $400-600 and can pump waste to a small holding tank.
Skip tankless water heaters in favor of a 6-gallon electric RV water heater ($150-250). Tankless units cost $600-1,500 and require significant electrical capacity or propane infrastructure. A small tank heater provides enough hot water for a quick shower and dish washing while drawing manageable power.
For heat, a small wood stove costs $400-1,200 and provides ample warmth for 200-400 square feet. Install it properly with code-compliant clearances (typically 18 inches from combustibles) and a Class A chimney pipe ($400-800). A vent-free propane heater offers an alternative for $200-400, though it requires adequate ventilation and produces moisture.
Avoid Common Budget-Busting Mistakes
Most tiny house budget overruns stem from preventable errors. Learning from others’ mistakes costs nothing and saves thousands.
Skipping foundation planning ranks as the most expensive oversight. A tiny house on a trailer needs proper tongue weight, axle capacity, and tie-down points, mistakes here risk structural damage during transport. A permanent foundation requires frost footings below your local frost line (check IRC code for your zone) and proper drainage. Factor foundation costs into your initial budget, not as an afterthought.
Underestimating tool needs drains budgets fast. Beyond basic hand tools, you’ll need a circular saw, drill/driver, impact driver, jigsaw, and level as bare minimums. Budget $400-700 for a basic cordless tool kit from a reputable brand. Buying cheap tools that break mid-project costs more than starting with quality gear.
Changing designs mid-build wastes materials and time. Framing a window opening, then deciding to move it, leaves you with unusable lumber and drywall. Lock in your design before buying materials. Inspiration photos from small space design sites are helpful during planning but cause chaos during construction.
Ignoring weatherproofing leads to expensive rot repairs. Use Tyvek or equivalent house wrap ($80-120 for a 200-square-foot tiny house) under your siding. Flash windows properly with self-adhesive flashing tape. Apply two coats of exterior primer and paint to all exposed wood. Water intrusion ruins framing and insulation fast, prevention costs far less than remediation.
Buying materials before verifying dimensions creates waste. Don’t order windows until wall framing is complete and rough openings are measured. Don’t purchase flooring until subfloor is installed and square footage is confirmed. A 10% overage is smart: a 50% overage is wasteful.
Finally, don’t skip permits to save money. Unpermitted work affects resale value, insurance coverage, and financing options. Most jurisdictions charge $300-1,500 for tiny house permits, a small price for peace of mind and legal occupancy. If exploring grants or financing options, permitted builds are usually mandatory.
Conclusion
Building a tiny house cheap comes down to smart planning, strategic material sourcing, and knowing when to DIY versus hiring professionals. Focus on a simple design with standard dimensions, source materials from lumber yards and salvage stores, and invest time in proper weatherproofing and code compliance. Skip the expensive off-grid systems initially, master basic construction skills before starting, and budget realistically for tools and permits. With careful execution, a functional tiny house can be built for $15,000-30,000, a fraction of conventional housing costs, while providing years of affordable, mortgage-free living.